
Introduction to Homemade Cream Puffs
If you’ve ever enjoyed a light, airy cream puff, you know just how delightful these pastries can be. Made from choux pastry, homemade cream puffs are not only incredibly impressive but also surprisingly easy to whip up in your kitchen. The crispy, golden shells provide the perfect contrast to a rich, creamy filling, making them a show-stopping dessert for any occasion.
Why Cream Puffs Are Ideal for At-Home Chefs
What makes cream puffs a fantastic choice for aspiring culinary creatives? First and foremost, they require minimal ingredients — many of which you likely already have on hand. With just water, butter, flour, and eggs, you can create a base that yields a versatile canvas for a multitude of fillings. Whether you choose whipped cream, chocolate mousse, or even a savory filling, the possibilities are endless!
Plus, the step-by-step process serves as an excellent introduction to baking techniques, enhancing your skills while preparing a dessert that never fails to impress your friends and family. Have you ever wanted to wow your guests with a dessert that looks intricate but is quite simple? Look no further! The satisfaction of mastering homemade cream puffs is sure to keep you coming back for more. For detailed tips and expert insights, the Joy of Baking offers great resources on pastry techniques to enrich your baking endeavors.
Stay with me as we dive deeper into the delightful world of homemade cream puffs!
Ingredients for Homemade Cream Puffs
Creating delightful homemade cream puffs starts with the right ingredients. Let's break down what you'll need for the perfect choux pastry and the accompanying whipped cream.
Essential Ingredients for Pâte à Choux
- Water: 1 ¼ cup (300 ml), divided to ensure the perfect consistency.
- Granulated Sugar: Just 1 teaspoon (4 g) adds a touch of sweetness.
- Kosher Salt: ½ teaspoon (2 g) to balance flavors.
- Unsalted Butter: ½ cup (114 g), cut into 8 slices, is crucial for that rich texture.
- All-Purpose Flour: 1 cup (124 g), measured accurately (remember to spoon and level!).
- Eggs: 4 large eggs will give the batter the structure it needs.
- Powdered Sugar: ¼ cup (12 g) for a light dusting on top.
Ingredients for Whipped Cream and Egg Wash
For the luxurious whipped cream, gather these essentials:
- Heavy Whipping Cream: 2 cups (480 ml) for that rich, decadent filling.
- Powdered Sugar or Granulated Sugar: ½ cup (24 g) to sweeten.
- Pure Vanilla Extract: 1 teaspoon (5 ml) to enhance the flavor.
You'll also need an egg for an egg wash:
- Large Egg: 1, combined with 1 tablespoon of water or milk to achieve that shiny finish.
Now that you have your ingredients ready, you're one step closer to making these elegant pastries! For tips on piping and baking, check out resources like Serious Eats for expert advice.
Step-by-step Preparation for Homemade Cream Puffs
Making homemade cream puffs can seem daunting, but with a bit of preparation and patience, you’ll create an impressive dessert that’s sure to delight. Let’s break down the process into manageable steps, ensuring your cream puffs are light, airy, and sophisticated.
Gather Your Kitchen Tools
Before you start, it’s essential to have your kitchen tools at the ready. Here’s what you’ll need:
- Stand mixer
- Cooling rack
- Pastry bag with plain and star pastry tips
- Parchment paper
- Saucepan
- Whisk and measuring cups
Having everything organized not only simplifies the process but also makes it a lot more enjoyable.
Create the Pâte à Choux Dough
The heart of any cream puff lies in the pâte à choux, a simple dough made from water, butter, flour, and eggs. Start by bringing 1 cup of water, granulated sugar, salt, and butter to a boil in a saucepan. Once the butter melts, swiftly incorporate the flour, stirring vigorously until the mixture forms a ball. This technique is crucial, as a well-prepared dough will ensure that your cream puffs rise beautifully.
Incorporate the Eggs Properly
Let your dough cool down a bit to about 130°F (54ºC). Then, add your eggs one at a time, mixing thoroughly after each addition. This step is where the magic happens! The eggs will transform the dough into a luscious, smooth paste that’s ready for piping. Make sure it’s shiny but firm; you want the dough to hold its shape.
Pipe and Shape the Cream Puffs
Time to get creative! Fill your pastry bag with the dough and pipe 2-inch rounds onto a lined baking sheet. Keep them spaced out to allow for expansion. A little tip: dampen your fingers and smooth any peaks left after piping to achieve a polished finish.
Bake and Cool the Shells
Preheating your oven to the right temperatures is key. Bake your cream puffs at various temperatures—starting at 425°F (218ºC)—without opening the oven door, for about 60 to 70 minutes. Once golden brown and light, transfer them to a cooling rack to firm up.
Make the Whipped Cream Filling
Now comes the delicious part! In your stand mixer, whip heavy cream, sugar, and vanilla until you reach stiff peaks. This airy filling complements the crispy shells wonderfully.
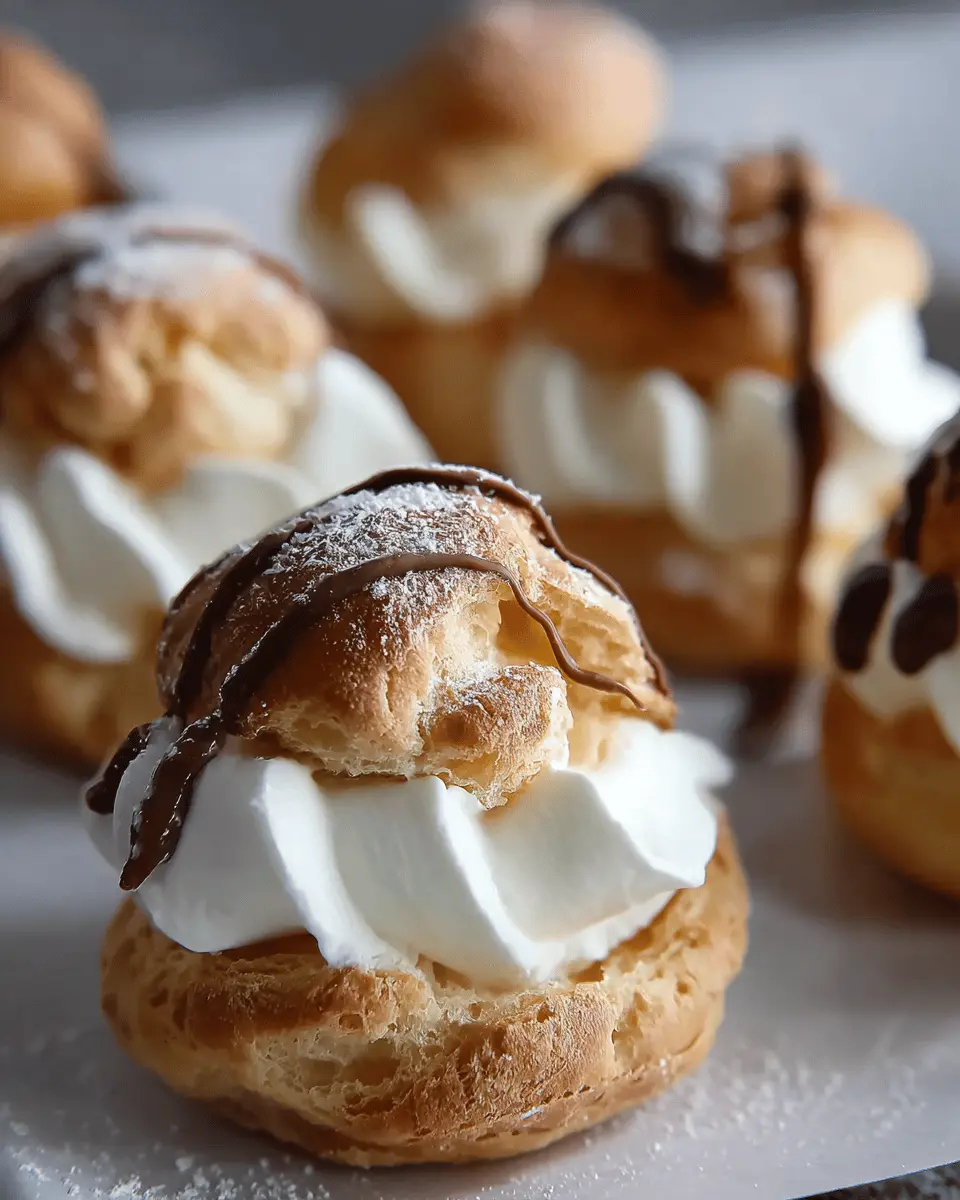
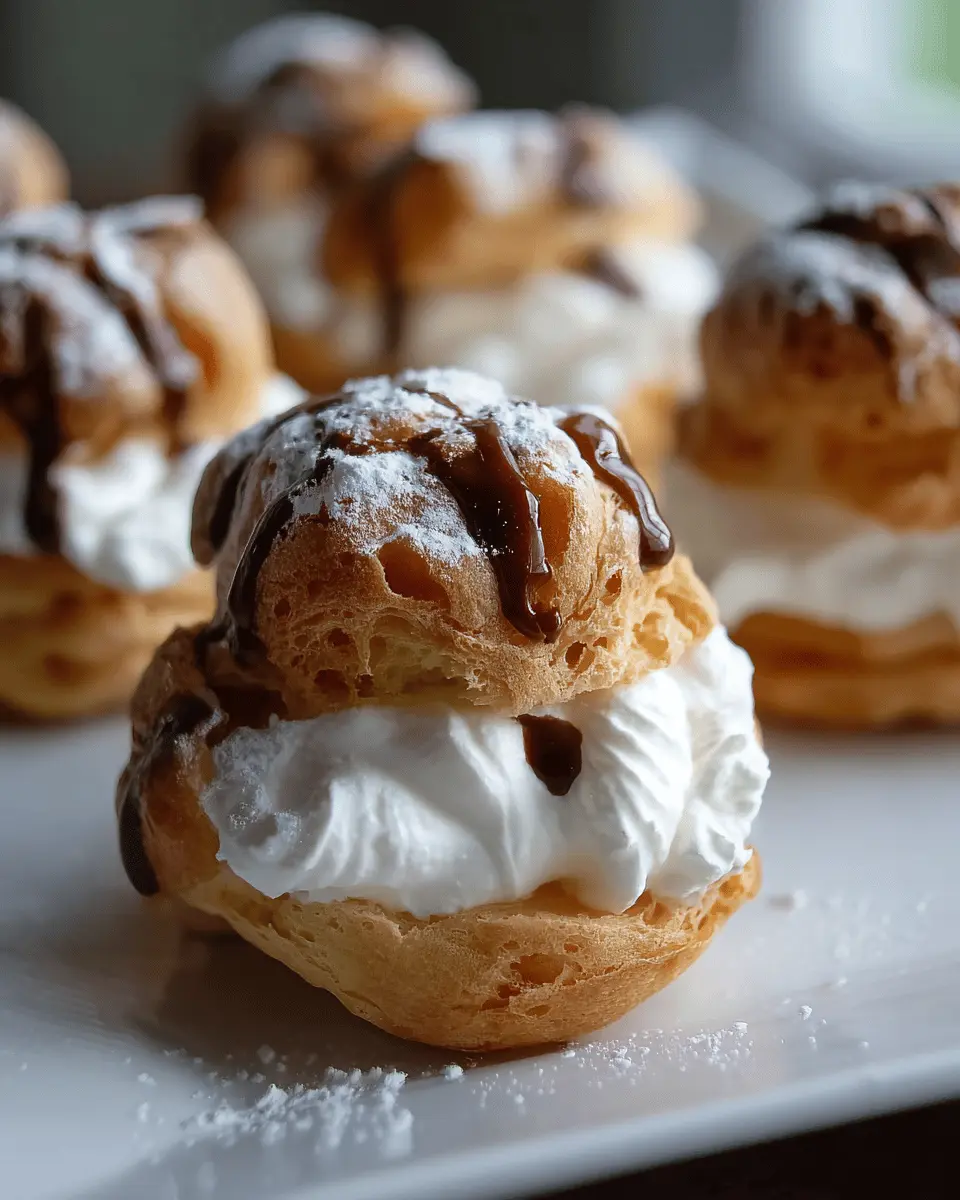
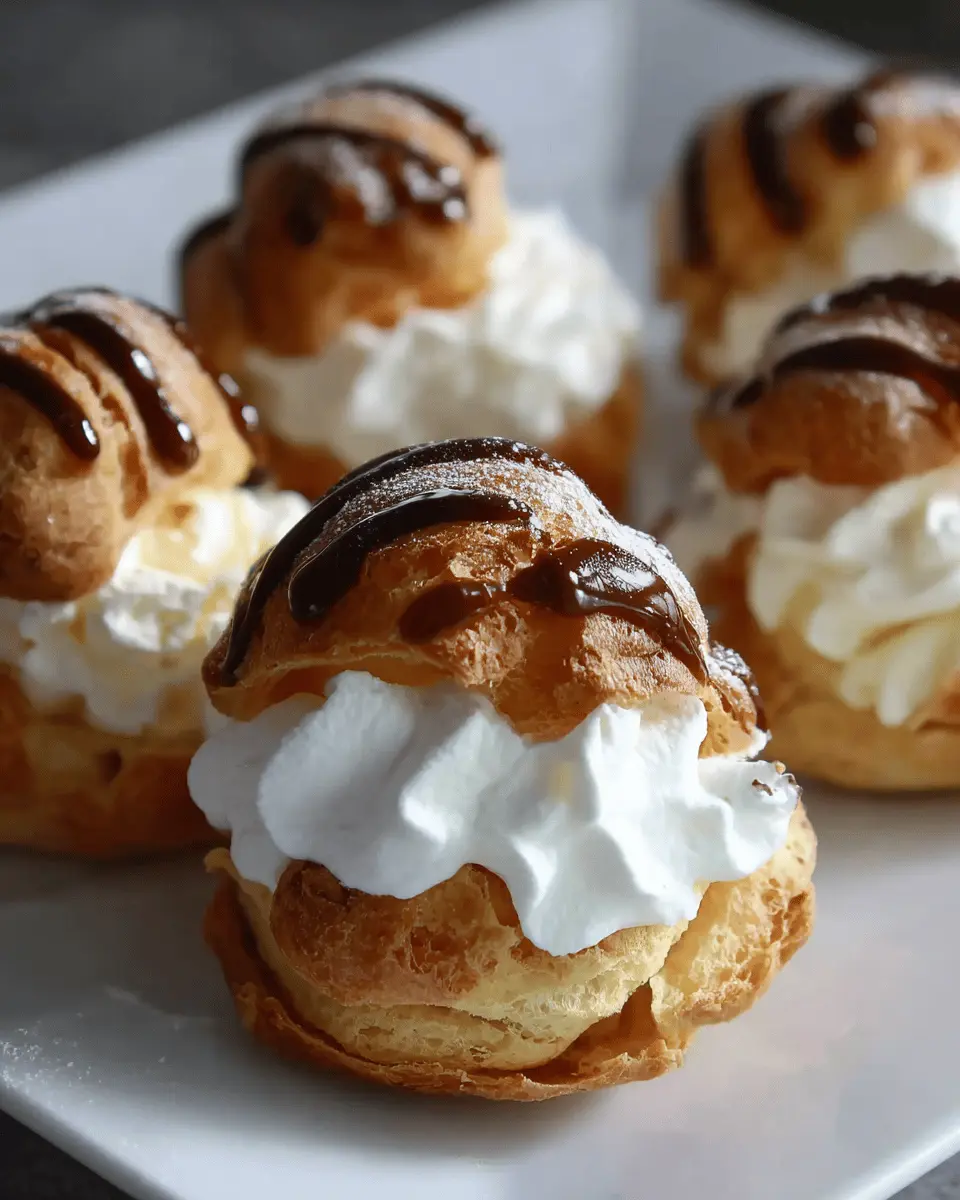
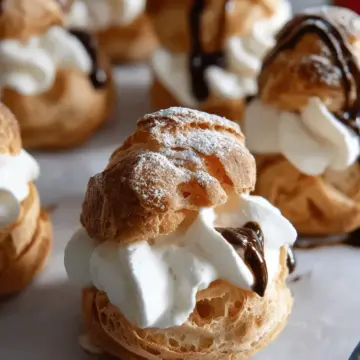
Assemble the Cream Puffs
Finally, it’s assembly time! Cut the cooled puffs in half, pipe that luscious whipped cream into the bottom half, and place the tops back on. Don’t forget to dust them with powdered sugar for that classic touch!
Now that you’ve mastered these steps, homemade cream puffs will certainly become a favorite in your dessert repertoire. They not only look impressive but also taste heavenly—a sweet reward for your efforts!
Variations on Homemade Cream Puffs
Chocolate-filled cream puffs
Switching up your homemade cream puffs with a rich chocolate filling is a game-changer! Simply melt dark chocolate and mix it with a touch of heavy cream to create a silky ganache. Once the cream puffs are baked and cooled, use a pastry bag to fill each shell with this luscious chocolate mixture. It’s an indulgent twist that chocolate lovers will adore!
Lemon zest whipped cream variation
For a bright and zesty flavor, add lemon zest to your whipped cream! Just 1-2 teaspoons of fresh zest will infuse a refreshing taste. This tangy variation beautifully balances the sweetness of the homemade cream puffs, making them a delightful treat. Top them off with a sprinkle of powdered sugar for an elegant finish. Enjoy experimenting with these variations to elevate your dessert game!
Baking Tips and Notes for Homemade Cream Puffs
Common Mistakes to Avoid
Making homemade cream puffs can be a delightful experience, but a few common pitfalls can derail your efforts. First, resist the urge to open the oven door while baking! This can cause the puffs to collapse. Also, ensure you properly cool the dough before adding the eggs; otherwise, you might end up with scrambled eggs in your mix. Lastly, if your puffs are flat, check your oven temperature with an oven thermometer to verify accuracy.
How to Store Baked Shells
To maintain the perfect crispiness of your baked shells, store them at room temperature in an airtight container for up to five days. If you need longer storage, freezing is an excellent option: simply place them in a freezer-safe bag for up to a month. When ready to use, reheat them at 300°F (149°C) for about 10 minutes to regain their crunch. For detailed tips on freezing, check out insights from Serious Eats.
Serving Suggestions for Homemade Cream Puffs
Creative Plating Ideas
Elevate your homemade cream puffs with stylish plating! Try arranging them in a playful pyramid for a striking visual effect. A sprinkle of powdered sugar adds an elegant touch. Consider serving them on a large, rustic wooden board accompanied by fresh berries or edible flowers, creating a whimsical garden theme. Garnish with mint leaves for an additional pop of color and fresh aroma.
Pairing with Hot Beverages
What’s better than enjoying homemade cream puffs with a steaming cup of your favorite beverage? Pair them with a rich espresso for a delightful contrast, or enjoy them with a comforting cup of chai or hot chocolate. The creamy filling and delicate pastry beautifully complement these drinks—perfect for a cozy afternoon treat. For an extra indulgent experience, why not whip up a homemade vanilla latte? Enjoy the warmth!
For more creative ideas, check out resources like Bon Appétit or Epicurious for new takes on serving desserts.
Time Breakdown for Homemade Cream Puffs
Preparation Time
Get your kitchen ready in 30 minutes! This includes measuring your ingredients and making the pâte à choux.
Baking Time
Set aside approximately 1 hour and 15 minutes for the baking process. Patience is key, as these delicate pastries need time to puff perfectly!
Total Time
In just 1 hour and 45 minutes, you'll have a batch of delicious homemade cream puffs ready to impress your friends and family.
Whether you're a seasoned baker or a novice, this time breakdown ensures you can fit in this delightful dessert into your day! Plus, you’ll find more tips on perfecting your technique in other cooking blogs like The Kitchn and Serious Eats.
Nutritional Facts for Homemade Cream Puffs
Calories per cream puff
Each homemade cream puff contains approximately 116 calories, making them a delightful, indulgent treat without completely derailing your daily calorie intake. You can enjoy these delicious pastries while still keeping an eye on your nutrition!
Breakdown of macronutrients
In addition to being low in calories, these cream puffs offer a balanced profile:
- Carbohydrates: 10g
- Protein: 3g
- Fat: 7g (with 4g of saturated fat)
These numbers reflect the delightful mix of textures and flavors in your homemade cream puffs. For a closer look at how to fit these sweet treats into a balanced diet, consider consulting the USDA Food Data Central for detailed nutritional information. Remember, moderation is key—enjoy these puffed pastries guilt-free!
FAQs about Homemade Cream Puffs
How do I know when the cream puffs are done baking?
The homemade cream puffs are perfectly baked when they are golden brown and feel light to the touch. You can test one by gently breaking it open; it should be dry inside, with a slightly crispy exterior. Remember, patience is key—avoid opening the oven door during baking to maintain oven temperature and ensure proper puffing!
Can I make cream puffs ahead of time?
Absolutely! You can prepare the baked shells in advance and store them in an airtight container at room temperature for up to five days. If you want to keep them longer, freezing is an option—just let them thaw before filling. However, for the best flavor and texture, assembling your cream puffs the same day is recommended.
What's the best way to fill cream puffs?
For a delightful filling experience, use a piping bag fitted with a star or round tip to pipe the whipped cream directly into the bottom half of each cream puff. This ensures a generous and even distribution of cream, creating a perfect balance of flavors and textures. Don't do it too soon before serving—keep filled puffs in the refrigerator for up to three days for optimal freshness!
For more tips on storing and serving desserts, check out this handy guide on dessert preservation techniques.
Conclusion on Homemade Cream Puffs
Homemade cream puffs are not only a delightful dessert but also a fun baking project. The crispy shells paired with fluffy whipped cream make for an irresistible treat. Whether you’re sharing them at a gathering or indulging on your own, these treats are sure to impress and satisfy your sweet tooth!
Homemade Cream Puffs: Easy, Indulgent Treats for Any Occasion
Equipment
- Stand Mixer
- Cooling Rack
- Pastry Bag
- Plain Pastry Tip
- Star Pastry Tip
Ingredients
Pâte à Choux
- 1 ¼ cup water, divided
- 1 teaspoon granulated sugar
- ½ teaspoon kosher salt
- ½ cup unsalted butter, cut into 8 slices
- 1 cup all-purpose flour, spoon and leveled see notes
- 4 large eggs
- ¼ cup powdered sugar, for dusting
Egg Wash
- 1 large egg
- 1 tablespoon water, or milk
Whipped Cream (4 cups)
- 2 cups heavy whipping cream, or heavy cream
- ½ cup powdered sugar, or granulated sugar
- 1 teaspoon pure vanilla extract
Instructions
Basic Instructions
- Preheat the Oven - Set the oven racks to upper-middle and lower-middle positions. Preheat to 425°F (218ºC). Line two sheet pans with parchment paper and set them aside.
- Make the Dough - In a large heavy-bottomed saucepan, add 1 cup of water, sugar, salt, and butter. Bring to a boil over medium-high heat and stir until the butter fully melts, about 2 minutes. Turn off the heat and immediately add the flour. Vigorously stir with a large spoon (non-metal) until the flour is incorporated. Increase the heat to medium, and constantly stir until it clumps together, about 4 to 5 minutes. The dough should look relatively dry and just begin to leave a film on the saucepan.
- Cool the Dough - Transfer the dough to a bowl of a stand mixer fitted with a paddle. Slowly stir on low speed (setting 2) to cool to 130°F (54ºC) or just below, about 2 to 3 minutes. This prevents the eggs from curdling when added.
- Add the Eggs in Stages - Add eggs one at a time, mixing on medium-low speed (setting 4) until each egg is fully incorporated, about 30 to 45 seconds per egg. Once 3 eggs are added, check to see if the dough pulls away from the bowl's sides in thick threads, it will not clear the bowl. It should be shiny but firm and not runny, so it’s easy to control when piped. If it’s still too thick, add the fourth egg and mix for 45 seconds.
- Piping the Dough - Add a large plain tip to a piping bag (Ateco 806). Option to lightly grease the inside of the pastry bag with cooking spray. This helps keep the sticky dough from clinging to the bag. Add the dough to the pastry bag. Pipe onto the sheet pan, creating a 2-inch circular ball. Pipe at least 2 inches apart from each other. They will expand to about 3 inches after baking. Add ¼ cup of water to a small bowl. Dip your finger in the water and flatten any tails left on the top when piping to create a smoother surface.
- Brush on Egg Wash - In a small bowl, whisk together one egg and 1 tablespoon of water. Brush the tops and sides of each dough ball with the egg wash.
- Gradual Baking Process - Place the sheet trays in the upper-middle and lower-middle positions. Bake for 10 minutes at each temperature setting: 425°F (218ºC), 375°F (191ºC), 325°F (163ºC), 275°F (135ºC), 225°F (107ºC), 200°F (93ºC). Do not open the oven door! It will take about 60 to 70 minutes of total baking time. To check for doneness, break open one of the pastries. It should be as dry and feel light in weight. If needed, continue to bake the pâte à choux at 200°F (93ºC). Transfer shells to a cooling rack. Cool completely and reserve until ready to fill.
- Make the Whipped Cream - In a stand mixer fitted with the whisk attachment, add heavy cream, powdered sugar, and 1 teaspoon vanilla extract to the bowl. Whip on medium-low speed (setting 4) until the cream is frothy with bubbles on the surface, about 1 minute. Increase the speed to medium-high (setting 8), and whip until smooth, stiff peaks form, about 2 minutes. If needed, continue to whip in 5-second intervals. Do not overwhip, or the cream will become curdled.
- Piping the Cream - Working in batches, add the whipped cream to a pastry bag fitted with a large star tip (Ateco 824). Use a serrated knife to cut the shells in half to create a top and bottom. Evenly pipe the whipped cream into the pastry bottoms. Gently place the lids on top of the cream.
- Top with Sugar - Sprinkle powdered sugar on top of each cream puff. Serve immediately, or refrigerate, uncovered, if not eating within one hour.
Leave a Reply