
Introduction to Red Velvet Cake
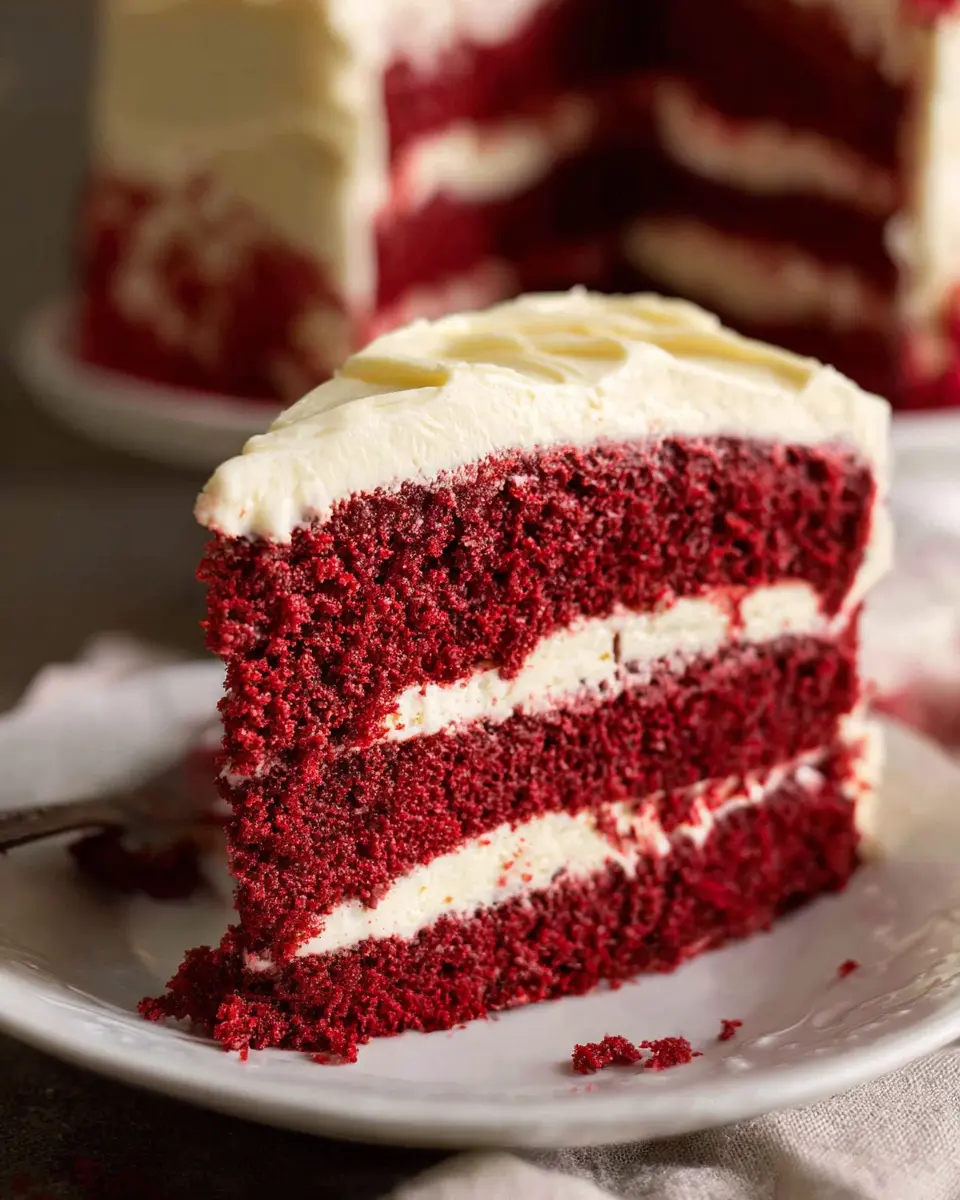
Red velvet cake is more than just a dessert; it's an experience that brings joy to special occasions and everyday moments alike. This visually stunning cake, with its rich crimson hue and enticing cream cheese frosting, has become a classic in American baking. But what makes it so special?
Why is Red Velvet Cake So Special?
The magic of red velvet cake lies in its unique combination of flavors and textures. With its soft, velvety sponge, this cake delivers a delightful buttery taste accompanied by subtle notes of chocolate and the tanginess of buttermilk. The contrasting cream cheese frosting adds a luscious creaminess that complements the cake’s dense crumb perfectly.
Historically, the cake gained popularity during the Great Depression and has since become a staple for celebrations, from birthdays to weddings. The vibrant color often symbolizes love and passion, making it a fantastic choice for romantic occasions—think about how memorable a slice could be at your next anniversary dinner!
For those intrigued by the origins, you can explore this detailed history of red velvet cake, uncovering tales of its transformation from a luxury treat to a beloved favorite. Whether you're baking for guests or treating yourself, diving into a recipe for red velvet cake is sure to evoke happiness in every bite.
Ingredients for Red Velvet Cake
Baking a red velvet cake is all about balance—between the rich, velvety texture and the distinct hint of chocolate. Let’s break down the essential ingredients!
Dry Ingredients
- 2 ⅔ cups (400 g) plain cake flour - This creates the soft texture.
- 2 tablespoon (10 g) cocoa powder, unsweetened - Just a hint adds depth.
- 1 teaspoon (5 g) baking soda - Not baking powder, this is key for the right rise.
- Pinch of salt - Enhances the flavors beautifully.
Wet Ingredients
- ½ cup (115 g) unsalted butter, softened - Brings that buttery flavor.
- 1 ½ cups (330 g) caster sugar - This sweetens your cake just right.
- 2 eggs, at room temperature - Ensure your eggs are fresh for the best results.
- 1 cup (250 ml) vegetable oil - Keeps the cake moist.
- 1 teaspoon white vinegar - Adds a slight tang that defines red velvet.
- 2 teaspoon vanilla extract - A classic enhancer for any cake.
- 1 cup (250 ml) buttermilk - This makes the cake tender.
- 2 ½ tablespoon red food coloring - The star of the show; a vibrant color is crucial!
Frosting Ingredients
- 14 oz (400 g) cream cheese, softened - Offers that signature cream cheese flavor.
- ½ cup (115 g) unsalted butter, softened - Adds richness to the frosting.
- 1 ½ teaspoon vanilla extract - Just like in the cake, vanilla’s a must.
- 4 cups (450 g) powdered sugar - For that but creamy and fluffy texture.
Now you're set to whip up your delicious masterpiece! Don’t forget to check out this guide on baking tips to elevate your red velvet cake game further. Happy baking!
Preparing Red Velvet Cake
Creating a stunning red velvet cake might seem daunting, but with the right steps, you’ll be whipping up this classic dessert like a pro in no time! Let’s dive into the preparation, ensuring every step is as smooth and flavorful as the cake itself.
Preheat and Prepare the Pans
First things first, preheat your oven to 180°C (350°F). This allows for even cooking and makes sure your layers rise properly. While that's heating up, grab your two 21cm (8-inch) round cake pans. Butter them generously, making sure you coat both the sides and the base. For an added touch and to help with easy removal later, sprinkle a bit of cocoa powder in the pans. This creates a beautiful contrast with the vibrant cake and prevents sticking.
Sift and Combine Dry Ingredients
Next, in a medium bowl, it's time to work on the dry ingredients. Combine 2 ⅔ cups (400 g) of plain cake flour, along with 2 tablespoons (10 g) of unsweetened cocoa powder, 1 teaspoon (5 g) of baking soda, and a pinch of salt. Sifting these ingredients together helps in aerating the flour and ensures a lump-free batter. The cocoa powder is going to give that classic mild chocolatey flavor that perfectly complements the red velvet cake's richness.
Cream Butter and Sugar
Now, let’s add some creaminess! In a large mixing bowl, beat ½ cup (115 g) of softened unsalted butter with 1 ½ cups (330 g) of caster sugar until the mixture is light and fluffy. This process should take about 3-5 minutes using an electric mixer, helping to incorporate air for a light texture. Remember, achieving a smooth consistency here sets the foundation for a delightful cake!
Add Eggs and Mix Wet Ingredients
With the butter and sugar joined together, it’s time to add in the eggs. Crack two eggs into the bowl, integrating them one at a time. Initially, the mixture may look curdled, but keep beating until it becomes silky. Then, add 1 cup (250 ml) of vegetable oil, 1 teaspoon of white vinegar, 2 teaspoons of vanilla extract, 1 cup (250 ml) of buttermilk, and 2 ½ tablespoons of red food coloring. Mix well until you have a luscious batter full of flavor and that iconic red hue.
Combine Wet and Dry Ingredients
Now, it's all about bringing those two worlds together! Gradually add your dry ingredients to the wet mix, beating just until combined. Some small lumps are totally okay—over-mixing can lead to a dense cake, which we definitely want to avoid. It’s all about that soft, velvety texture of a classic red velvet cake.
Bake the Cakes
Finally, divide your cake batter evenly between the prepared pans and pop them in the oven. Bake for 25 to 30 minutes, or until a toothpick inserted comes out clean. Once ready, let them rest in the pans for about 10 minutes before transferring to a wire rack to cool completely. This method ensures your red velvet cake remains deliciously moist.
With these straightforward steps, you're well on your way to creating an unforgettable red velvet cake that is sure to impress at any gathering! Want more baking tips? Explore this guide on using cake flour for the best results!
Variations on Red Velvet Cake
Red Velvet Cupcakes
If you're a fan of personal-sized treats, why not try red velvet cupcakes? This version retains all the classic flavors of the beloved cake but in a convenient, grab-and-go form. Simply follow the same batter recipe from the cake, fill cupcake liners about two-thirds full, and bake for 18-20 minutes. Top with a generous swirl of cream cheese frosting, and you've got an adorable dessert perfect for any gathering!
Gluten-Free Red Velvet Cake
For those avoiding gluten, you can create a gluten-free red velvet cake with a simple swap! Use a 1:1 gluten-free baking flour. The result is just as moist and delicious, ensuring everyone can indulge. Remember, the key is to keep the wet ingredients the same for that authentic, velvety texture. Check out resources like Gluten-Free Baking for further tips on perfecting your gluten-free treats!
Cooking Tips and Notes for Red Velvet Cake
Avoiding Overmixing
When making your red velvet cake, it's crucial to avoid overmixing the batter. Overmixing can lead to a dense cake instead of the light, fluffy texture you desire. Once you add the dry ingredients, mix until just combined—it's perfectly fine to see a few small lumps. This ensures that your cake remains soft and velvety.
Tips for Using Food Coloring
For that signature vibrant color in your red velvet cake, be mindful when using food coloring. Liquid food coloring can quickly saturate your batter, so start with a little and adjust as needed. Consider using gel food coloring for a more concentrated hue without compromising consistency. It's also helpful to use a spatula to evenly fold in the color, ensuring every bite maintains that captivating red shade!
Serving Suggestions for Red Velvet Cake
Perfect Pairings and Presentation Ideas
When it comes to serving red velvet cake, think beyond just the slice! This vibrant dessert pairs beautifully with:
- Creamy Vanilla Ice Cream: The contrasting flavors elevate the cake’s rich taste.
- Fresh Berries: Strawberries and raspberries add a refreshing burst. Plus, they look gorgeous against the red!
- Coconut Whipped Cream: For a tropical twist, this dairy-free option will keep things light and fluffy.
For presentation, consider using a cake stand to showcase your masterpiece. Garnish the plate with a dusting of icing sugar or a few strategically placed berries for that Instagram-worthy effect. This is not just a dessert; it’s an experience!
For more serving ideas, check out sites like Taste of Home or Food Network for additional inspirations.
Time Breakdown for Red Velvet Cake
Preparation Time
The preparation time for your luscious red velvet cake is about 30 minutes. This includes gathering your ingredients, mixing the batter, and getting your pans ready.
Cooking Time
Once you're ready to bake, the cooking time takes about 25 minutes. Keep an eye on those cakes, and use a toothpick to check for doneness!
Total Time
In total, from start to finish, you’ll need approximately 55 minutes to create this show-stopping dessert. Perfect for impressing guests or treating yourself on a cozy weekend! For more tips and tricks, check out our guide on baking fundamentals here.
Nutritional Facts for Red Velvet Cake
Calories
A generous slice of red velvet cake packs approximately 350-400 calories, making it a delightful indulgence for any dessert lover. It's a treat that satisfies your sweet cravings without going overboard—perfect for those special occasions!
Sugar Content
Each slice typically contains around 30-40 grams of sugar. While it adds to the cake's decadent flavor, moderation is key. Accompanying it with a cup of tea could balance the sweetness wonderfully!
Fat Content
With about 20 grams of fat per slice, this red velvet cake derives richness from the butter and cream cheese frosting. While it’s best enjoyed as an occasional treat, the blend of flavors and textures makes it a beloved classic.
Considering a healthier alternative? Check out this article on healthier cake recipes for some inspiration!
FAQs about Red Velvet Cake
Can I Use a Different Type of Food Coloring?
Absolutely! While traditional red food coloring is key to the signature look of red velvet cake, feel free to experiment. Gel food coloring offers vibrant color without changing the cake's moisture content, and you can even make it with natural alternatives like beet juice for a more subtle hue. Just keep in mind that the shade may vary based on your choice!
What’s the Best Way to Store Red Velvet Cake?
To keep your red velvet cake fresh, store it in an airtight container at room temperature for up to two days. For longer storage, refrigerate it, but ensure it's wrapped well to maintain moisture. If you prefer, you can freeze the cake layers for up to three months—just layer them with wax paper and wrap tightly.
Can I Make Red Velvet Cake Ahead of Time?
Definitely! Making your red velvet cake ahead can save time. Prepare the cake layers and store them in the fridge or freezer, then frost just before serving. This way, you'll enjoy it fresh while cutting down on last-minute stress!
Conclusion on Red Velvet Cake
Celebrating the Love for Homemade Treats
There's something truly special about baking a red velvet cake from scratch. It’s not just about the delicious layers and rich cream cheese frosting; it's about the joy of sharing it with loved ones. So next time you're in the kitchen, embrace the tradition and make this iconic treat!
For more insights on baking techniques and delicious recipes, check out resources from Serious Eats and The Kitchn. Happy baking!
Red Velvet Cake
Equipment
- Electric beater
- Stand Mixer
- Oven
- Cake pans
- Cooling Rack
Ingredients
Dry Ingredients
- 2 ⅔ cups plain cake flour 400 g
- 2 tablespoon cocoa powder unsweetened
- 1 teaspoon baking soda NOT baking powder
- 1 pinch salt
Wet Ingredients
- ½ cup unsalted butter softened
- 1 ½ cups caster sugar 330 g
- 2 eggs at room temperature
- 1 cup vegetable oil 250 ml
- 1 teaspoon white vinegar
- 2 teaspoon vanilla extract or essence
- 1 cup buttermilk at room temperature
- 2 ½ tablespoon red food colouring liquid
Frosting
- 14 oz Philadelphia Cream Cheese softened
- ½ cup unsalted butter softened
- 1 ½ teaspoon vanilla extract
- 4 cups soft icing sugar sifted
Instructions
Cake Preparation
- Preheat oven to 180C/350F. Butter 2 x 21cm round cake pans and dust with cocoa powder.
- Sift the Dry Ingredients and whisk to combine in a bowl.
- Place butter and sugar in a bowl and beat with electric beater or in stand mixer until smooth and well combined.
- Add eggs, one at a time, beating in between to combine until smooth.
- Add vegetable oil, vinegar, vanilla, buttermilk and red food colouring. Beat until combined and smooth.
- Add Dry Ingredients. Beat until just combined - some small lumps is ok.
- Divide batter between cake pans. Bake for 25 - 30 minutes or until a toothpick comes out clean.
- Rest for 10 minutes in the pan then turn out onto a cooling rack.
Frosting Preparation
- Beat together cream cheese, butter and vanilla for 3 minutes.
- Add icing sugar and beat for 2 minutes or until frosting is light and fluffy.
Frost Cake
- Cut the top off the cake using a serrated knife.
- Spread one cake with 1 ½ cups of frosting. Top with the other cake.
- Spread top and sides with remaining frosting.
- Optional: Crumble offcuts and use to decorate the top rim and base of the cake.
Leave a Reply