
Introduction to the Best Home-Baked Japanese Cheesecake
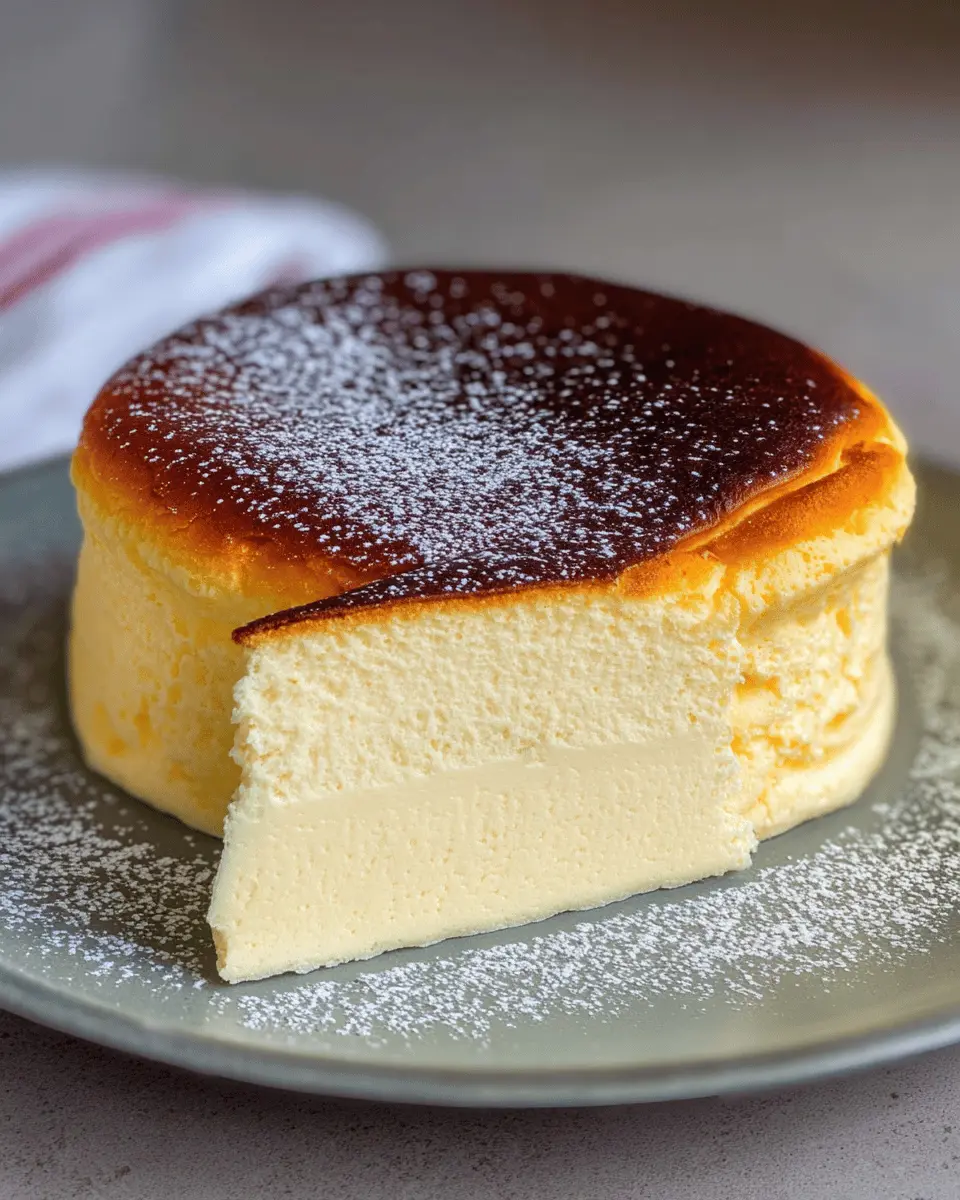
If you haven’t experienced the magic of Japanese cheesecake, you’re in for a delightful treat! This fluffy, jiggly dessert has a light and airy texture that melts in your mouth, often earning it the nickname Japanese cotton cheesecake. Unlike traditional cheesecakes, which can be dense and rich, this version is like indulging in a cloud of creaminess.
Why is Japanese cheesecake a must-try? For starters, it offers a wonderful balance between sweet and savory flavors, making it versatile enough for any occasion. Whether you're a seasoned baker or just dipping your toes into the world of home baking, this recipe strikes the ideal balance between simplicity and elegance. Plus, the process of creating this cake is both fun and gratifying. You’ll love the moment you pull it out of the oven and get to witness that beautiful jiggle!
For an insight into the origins and science behind this delightful treat, check out Serious Eats and explore how different cultures put their spin on cheesecake. So, are you ready to impress your friends and family with the best home-baked Japanese cheesecake? Let's dive into the foolproof recipe!

Ingredients for the Best Home-Baked Japanese Cheesecake
Essential ingredients to gather
To create the best home-baked Japanese cheesecake, you’ll need a few essential ingredients that come together to deliver that unique fluffy texture and delicate flavor:
- Eggs: You’ll use 5 egg whites and 5 egg yolks for a perfect balance.
- Cream cheese: An 8 oz bar is key for that rich creaminess.
- Butter: A ¼ cup adds moisture and richness.
- Milk: ½ cup will create a smooth batter.
- Sugar: Two types—¼ cup for the meringue and another ¼ cup for the batter—ensures the right sweetness.
- Cornstarch & flour: 2 tablespoon of cornstarch and ¼ cup of flour are essential for the cake's structure.
For a deeper dive into the chemistry of baking, check out this baking science guide.
Possible substitutions
If you’re missing an ingredient or two, don’t worry! Here are some substitutions to keep in mind:
- Cream cheese: Neufchâtel cheese or even mascarpone can be alternatives, although they may slightly change the flavor.
- Butter: You may replace butter with coconut oil for a dairy-free option.
- Flour: Try substituting all-purpose flour with rice flour or gluten-free blends for a gluten-free version of this delightful cheesecake.
Using these ingredients and substitutions, you’re on your way to impressively fluffy, indulgent flavors that make this the best home-baked Japanese cheesecake you’ve ever made!
Step-by-step Preparation of Japanese Cheesecake
Creating the best home-baked Japanese cheesecake can seem intimidating, but with a little patience and attention to detail, you'll be rewarded with a delightful dessert that's fluffy and light as a cloud! Let's walk through the different steps to ensure your cheesecake turns out beautifully.
Separating the eggs
Start by carefully separating the eggs to ensure they are clean and free from any yolk in the egg whites; this is crucial for achieving stiff peaks later. Place the egg yolks in one bowl and the egg whites in another. While some people find this step daunting, I like to crack each egg open over a small bowl first; this way, if any shell slips in, it’s easier to remove. Don’t forget to let your eggs come to room temperature for optimal mixing!
Making the cake batter
In a small saucepan, combine 8 oz of cream cheese, ¼ cup of butter, and ¼ cup of fine sugar over low heat. Stir gently until the mixture is smooth and evenly combined. This step creates a rich base for your cheesecake. Once melted, remove the pot from heat and whisk in the egg yolks, followed by the cornstarch, flour, and milk. Mix until there are no lumps—smooth is the name of the game here! If you're feeling adventurous, consider adding a splash of vanilla extract for extra flavor.
Preparing the meringue
The key to creating that light and airy texture lies in the meringue. In your mixer bowl, add 5 egg whites and a pinch of cream of tartar. Beat the egg whites on medium speed until soft peaks form, then gradually add in ¼ cup of sugar. Continue to mix until stiff peaks form. The meringue should be glossy and hold its shape when you lift the beaters—this might take a few minutes, but patience pays off!
Combining the batter and meringue
Once your meringue is ready, it's time to combine it with the batter. Start by adding a small portion of the meringue into your cake batter and gently folding it in. This will lighten the batter, making it easier to incorporate the rest of the meringue. Continue adding the meringue in stages, gently folding until everything is beautifully blended. Be careful not to over-mix, as this will deflate your air-filled creation!
Baking using the bain-marie method
The final step involves setting your cheesecake up for success in the oven. Preheat it to 330°F and prepare a bain-marie by placing a deep baking pan filled with water on the lower rack. This steaming method keeps the cheesecake moist and helps it rise evenly. Carefully pour your batter into the prepared pans and bake for the first 25 minutes. Then, lower the temperature and allow it to continue baking gently for another 45 minutes. Trust me, the scent wafting through your kitchen during this time will be irresistible!
With this step-by-step guide, you’re well on your way to impressing friends and family with the best home-baked Japanese cheesecake! Patience is key, so don’t rush the baking process, and enjoy every moment of this delightful journey to cheesecake perfection. For more tips or to explore the full recipe details, check out Kat Lieu’s complete guide.
Variations of Japanese Cheesecake
Matcha-flavored Japanese cheesecake
If you're a fan of matcha, try incorporating this vibrant green tea powder into your Japanese cheesecake for a delicious twist. Just add 1-2 tablespoons of matcha powder to your batter for a beautiful color and rich flavor. It pairs perfectly with a light and fluffy texture, making it one of the best home-baked Japanese cheesecake variations to impress your friends!
Gluten-free Japanese cheesecake options
For those requiring gluten-free options, you can easily substitute the flour in the original recipe with rice flour or Mochiko. This simple swap will allow everyone to indulge in the bouncy goodness of Japanese cheesecake without worry. Embrace creativity by adding gluten-free toppings like fresh fruits or a drizzle of honey to elevate your dessert experience!
Cooking Tips and Notes for Japanese Cheesecake
Common pitfalls to avoid
Creating the best home-baked Japanese cheesecake can be tricky, but avoiding certain pitfalls will help ensure success. Firstly, be cautious when mixing; under-mixing will result in uneven texture, while over-mixing can lead to a dense cake. Also, temperature is key—ensuring your oven is correctly preheated will help the cake rise beautifully. Lastly, let the cake cool gradually in the oven to prevent cracks.
Recommended tools for success
Having the right tools can make a world of difference. Ensure you have a reliable stand mixer for whipping egg whites to stiff peaks, as this is crucial for that airy texture. Use a digital kitchen scale for precise measurements, and don’t forget quality baking pans lined with parchment paper for easy release. A trusty thermometer can also help monitor your oven's temperature accurately. For more expert advice, consider checking out resources like King Arthur Baking.
Serving Suggestions for Japanese Cheesecake
Toppings to Enhance the Experience
To make your best home-baked Japanese cheesecake even more delightful, consider these delicious toppings:
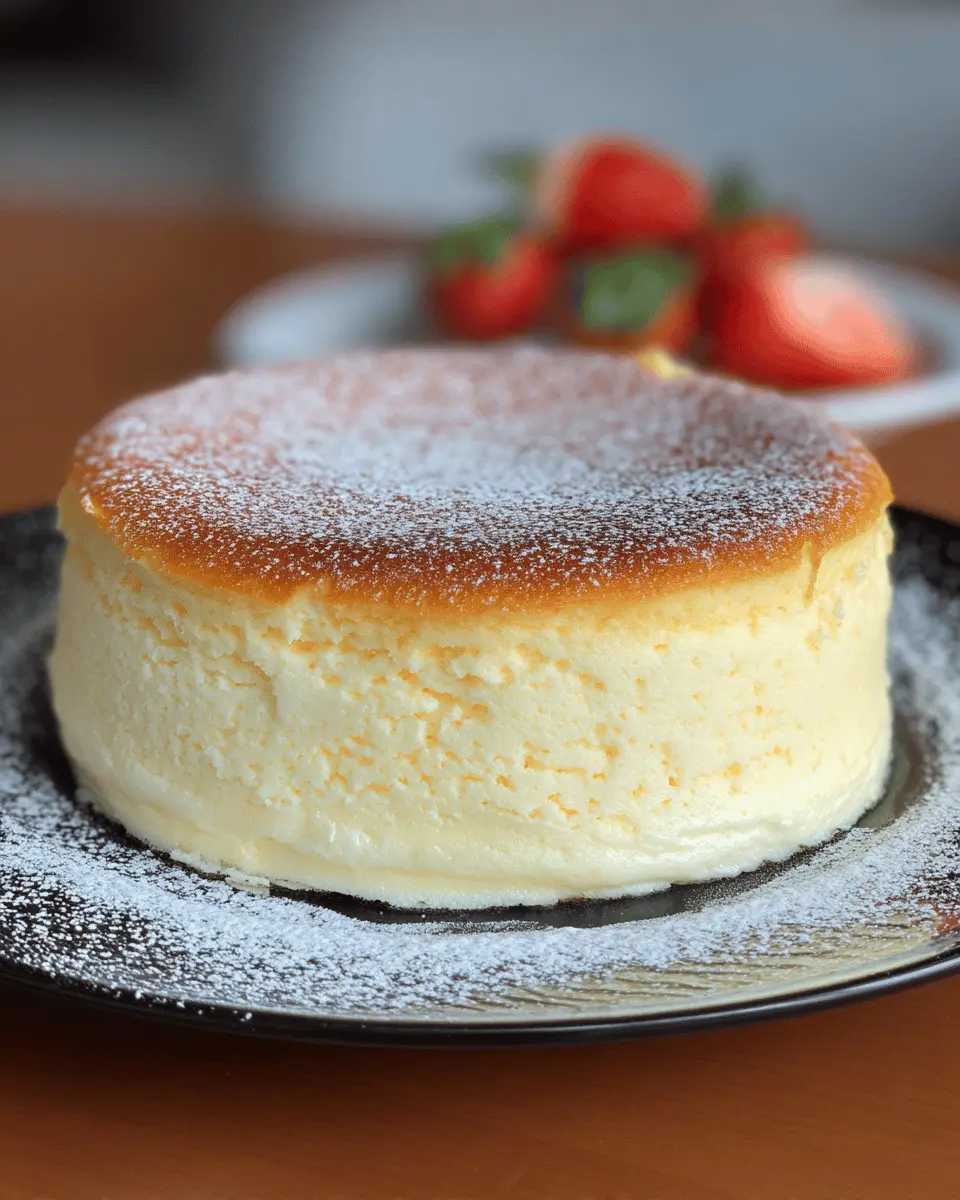
- Fresh Fruits: Strawberries, blueberries, or mango slices add a refreshing burst of flavor.
- Dusting of Powdered Sugar: A light sprinkle gives an elegant finish and sweetness.
- Honey or Maple Syrup: For an extra touch of sweetness and a hint of natural flavor.
- Matcha Powder: A sprinkle of matcha adds a unique earthy flavor that pairs beautifully.
These toppings not only enhance the look but elevate the taste of your cheesecake.
Perfect Pairings with Beverages
When enjoying this light and fluffy cake, beverage pairings can make all the difference:
- Green Tea or Matcha Latte: The bitterness of green tea complements the cheesecake’s sweetness.
- Chai or Earl Grey Tea: These aromatic teas add warmth and spice.
- Sparkling Water: A refreshing, carbonated option that cleanses the palate between bites.
Exploring these combinations will make your dessert experience truly memorable!
Time Breakdown for Japanese Cheesecake
Preparation time
Getting started is a breeze! You'll need about 20 minutes to gather your ingredients, separate your eggs, and whip up that smooth, luscious batter.
Baking time
The baking process takes approximately 70 minutes, including the crucial rising time. This step is key to achieving that signature fluffy texture.
Total time
In under 90 minutes, you'll create the best home-baked Japanese cheesecake that's sure to impress friends and family alike! For a deeper dive into baking techniques, check out resources on japanese culinary traditions to enhance your skills. Happy baking!
Nutritional Facts for Japanese Cheesecake
Calories per serving
Each serving of this delightful best home-baked Japanese cheesecake contains approximately 230 calories, making it a lighter choice for dessert lovers.
Macronutrient breakdown
A serving boasts around:
- Fat: 15g
- Carbohydrates: 18g
- Protein: 5g
Enjoy this heavenly dessert in moderation, and balance it with your daily nutritional needs! For more information on the health benefits of cream cheese, check out Healthline.
FAQs about Japanese Cheesecake
What makes Japanese cheesecake different from traditional cheesecake?
Japanese cheesecake stands out from traditional cheesecake primarily due to its airy, light texture. While traditional cheesecake is dense and creamy, the best home-baked Japanese cheesecake uses whipped egg whites to create a soufflé-like consistency. This results in a cake that jiggles and is less sweet, making it a delightful treat that feels less indulgent. The incorporation of ingredients like cornstarch and the gentle folding technique contributes to its fluffy charm.
How can I store leftover Japanese cheesecake?
If you have any leftover cheesecake (though it might be hard to resist), simply cover it with plastic wrap or place it in an airtight container. Store it in the refrigerator for up to three days. Just remember; it’s best enjoyed fresh, so don’t hesitate to share or finish it off within a few days!
Can I use a different sweetener in the recipe?
Absolutely! You can substitute granulated sugar with natural sweeteners like honey, agave syrup, or even stevia. Just keep in mind that each sweetener has a different level of sweetness and may alter the texture slightly, so adjust accordingly. If you're experimenting with sweeteners, check out some expert advice on baking with alternatives to ensure the best home-baked Japanese cheesecake experience!
Conclusion on the Best Home-Baked Japanese Cheesecake
In conclusion, this best home-baked Japanese cheesecake is not only a delightful treat for your taste buds but also an impressive dessert to share with friends and family. With its light, fluffy texture and subtle sweetness, you'll enjoy every moment of making and savoring this heavenly dessert. Happy baking!
The Best Home-Baked Japanese Cheesecake Recipe by Kat Lieu
Equipment
- mixer
- pot
- Baking Pan
- parchment paper
- Oven
Ingredients
Egg White Meringue (Stiff Peaks)
- 5 large egg whites
- ¼ teaspoon cream of tartar or vinegar or lemon juice
- ¼ cup fine sugar not confectioner sugar
Cake Batter
- 5 large egg yolks
- 8 oz cream cheese 1 bar
- ¼ cup butter
- ½ cup milk
- ¼ cup fine sugar
- 2 tablespoon corn starch magic ingredient
- ¼ cup flour use rice flour or Mochiko for gluten-free
Instructions
Preparation
- Separate 5 beautiful eggs. Place the egg yolks in a bowl, and the egg whites in a mixer bowl.
- Place the butter, cream cheese and ¼ cup of fine sugar into a pot over low-heat. Allow the ingredients to melt, and mix together into a beautifully smooth batter mixture.
- Remove the pot from heat, and add the egg yolks into the batter mixture. Mix well, but gently.
- Add the cornstarch and flour. Once again, mix well. Clumps should disappear.
- Add milk and optionally vanilla extract or other flavors of your choice.
- Mix well. The batter should be smooth and liquid-y. You won’t have to strain this mixture.
- Set aside the batter as you beat the egg whites into stiff peaks.
- Pre-heat oven to 330F. Prepare a bain-marie by putting water in a deep rectangular baking pan or dish. Place into the oven.
- Prepare baking pans— with these ingredients, you can bake one 8-inch cake or two 6-inch cakes. Line the bottoms of the baking pans with circular parchment paper.
- Once you achieve stiff peaks, place some beaten egg white into the batter and mix together.
- Repeat the above step two more times.
- Pour the batter into the rest of the egg whites and mix together using folding techniques. Avoid over-mixing or under-mixing.
- Pour the well-incorporated, but not over-mixed batter into the baking pan(s).
- Bake bain-marie style for 25 minutes at 330F.
- If your cake is not rising, your oven temperature may be too low. Raise by 10 degrees and allow it time to rise.
- After 25 minutes, if the cake has not risen, keep the temperature and allow more time. Crack the oven door slightly for 10 seconds, then lower the oven temperature to 245-265F and bake for an additional 45 minutes.
- Allow your cake to rest in the oven after baking for about 10 minutes.
- Remove from the oven. Use oven mitts as needed.
- Place a sheet of parchment paper over the cake. Place a plate over the cake and flip it. Remove the cake from the pan.
- Remove the wet parchment paper and replace the bottom parchment paper of the cake.
- Flip the cake again onto a presentation or serving plate.
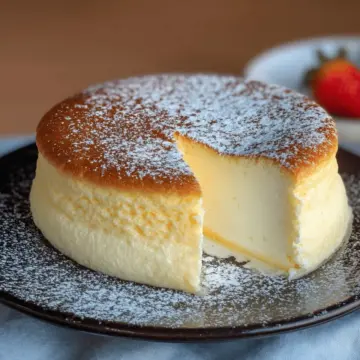
- Play with the bouncy jiggly-ness of the cake. Serve when still warm, or chill in the fridge.
Leave a Reply